Here is the second in my series of lessons for absolute beginner quiltmakers. I wish I had this information in one place when I first started making quilts! There are a number of different choices for nearly every technique I describe. These are my favorite techniques, including:
Folding your yardage
Using a rotary cutter
Chain piecing
Sandwiching your layers
Quilting your sandwich
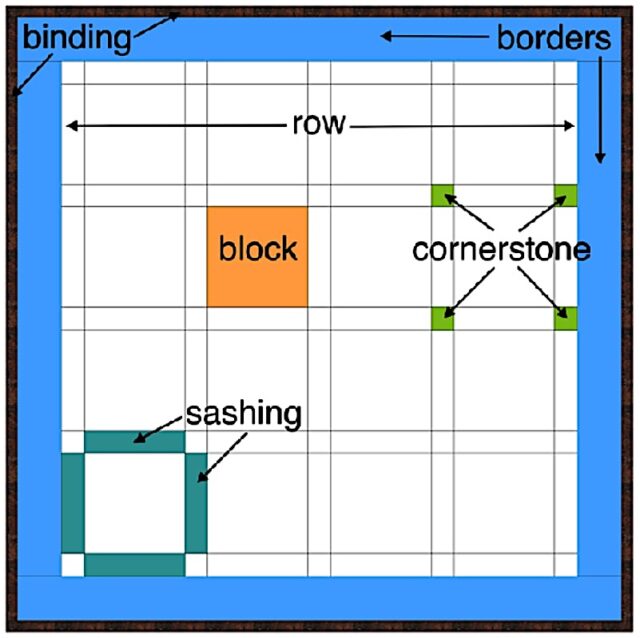
Binding your quilt
Washing your quilt
Reference, including quilt sizes and yardage measurements
I have loved working with fabric since I took a sewing class in junior high school. At that time, I made everything from men’s shirts to ice skating dresses. Then I went off to college and didn’t have time to sew for a few years. I took a quilting class in 1982 but, for some reason, it didn’t stick. Then I took another quilting class in 2019 and this time it really stuck! I’ve been making quilts ever since, and loving it. I love the colors, the designs, and the satisfaction I get when I complete a new quilt.
People ask me what I do with all the quilts I make, which comes out to about one every two weeks. I keep my favorites, give many to family and friends, and donate the rest to people in need.
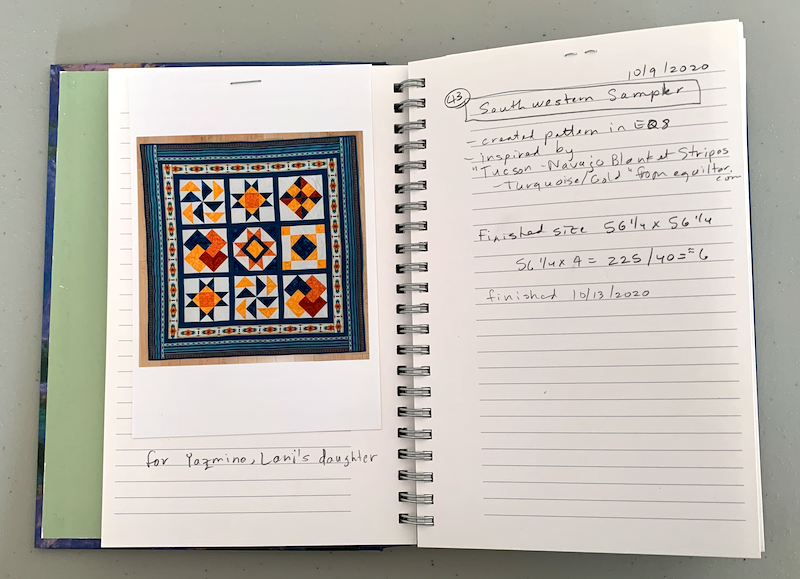
I started keeping a notebook in 2020. I wish I had started at the beginning of my quilting journey. In the notebook, I write the name of the pattern, if there is one, the name of the fabric, if known, and notes I take as I go. I also include a photo of the finished quilt. Since I give so many away, I like having a photo to remember quilts I have made but no longer have in our home. I also keep track of the number of the quilt, that is how many I’ve made up to that point. I have no idea why I do that but I do.
I notice that I like to write down everything I learn. I think that’s because I like organizing my thoughts into logical categories and also because I don’t want to have to remember everything. I especially like having project steps written down so I can go back to them later. I figured since I’m writing them down anyway, I might as well share them with others. Here is the Introduction I came up with for absolute beginners at making quilts.
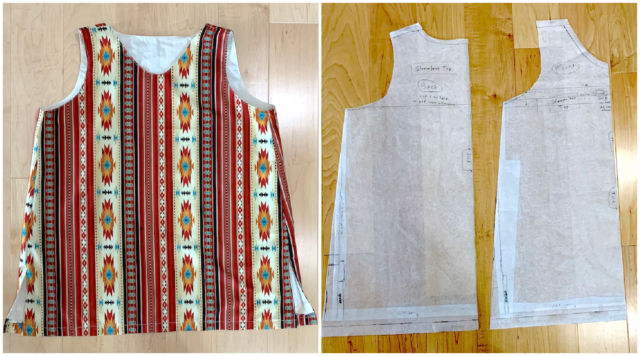
I showed you how I made a pattern for a sleeveless top in a previous blog post (https://quiltingbydiana.com/sewing-a-garment-for-the-first-time-in-over-30-years/). When I washed the completed top, I didn’t like the way the facings needed ironing to make them lay flat again. And I didn’t like seeing the exposed seams. So I decided to figure out how to make the top fully lined. To my surprise, not only did the lined top launder better and look better but it felt better to wear! I thought it would be too warm but, perhaps because I used all cotton fabric, it did not feel too warm at all.
One video I watched made all the difference for me in understanding the “burrito” method for sewing a lining into a sleeveless top. It was “Using The BURRITO METHOD To Create a Sleeveless Top” by Ellie and Mac Patterns. It’s at https://youtu.be/1_GmIQbijks I highly recommend you watch this video before trying the burrito technique.
The instructions below assume your top is tunic length. If it is shorter, and you don’t need vents for comfort (especially sitting down), then ignore the instructions about creating and finishing vent openings. The vents are closed but the bottom edge is hemmed but not connected. I find that it falls more nicely that way.