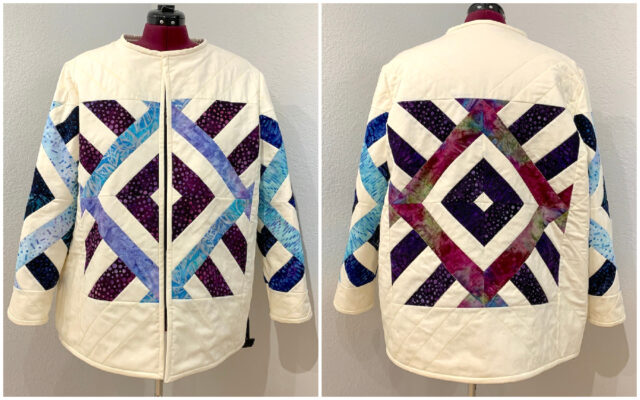
I’m ready to try making another quilted jacket. I plan to make the following changes:
- Create blocks and surround them with solid fabric for each piece instead of cutting from an already made quilt.
- Add side pockets.
- Add a floating lining.
Create “Fabric”
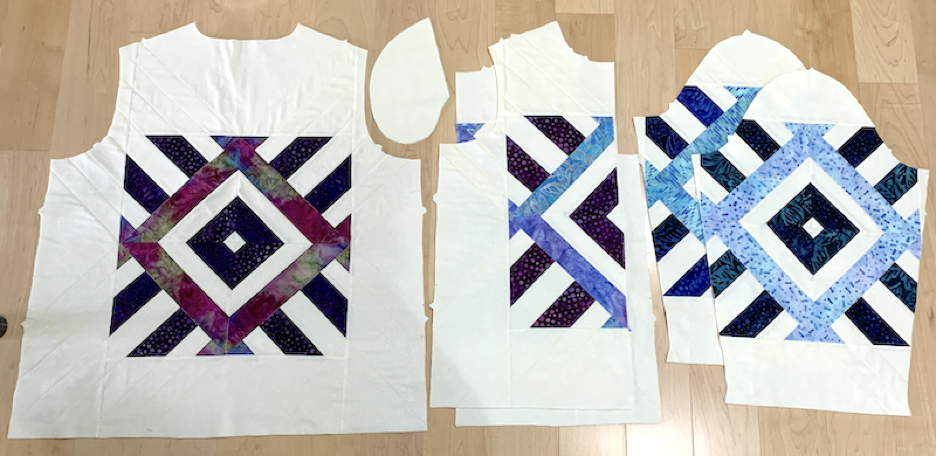
To create the “fabric” for this jacket, I pieced 4 blocks using the “Second Sunrise” design by Raymond Steeves at https://3dudesquiltingdesigns.com/ Each block ends up being about 18 inches by 18 inches.
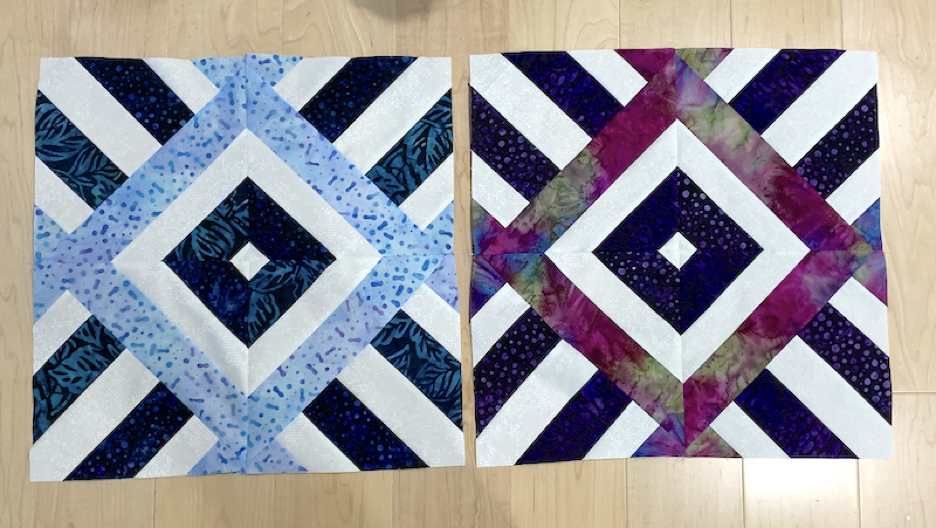
I figured one whole block for the back, one for each sleeve, and one block split across the front.
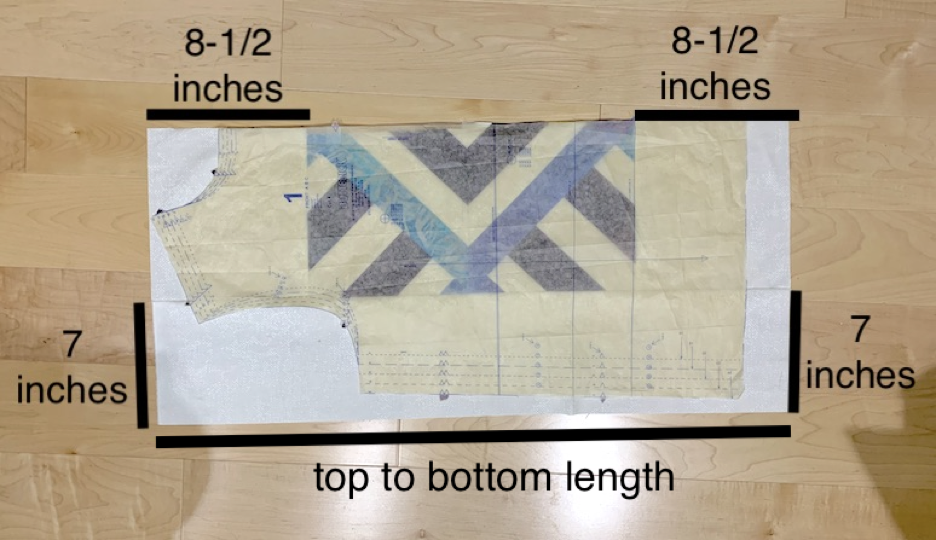
Then I compared the blocks to the jacket pattern pieces and figured out how much to add to each block to make it big enough to cut the piece out. For example, here is what I added for each front piece:
Quilt the Pieces
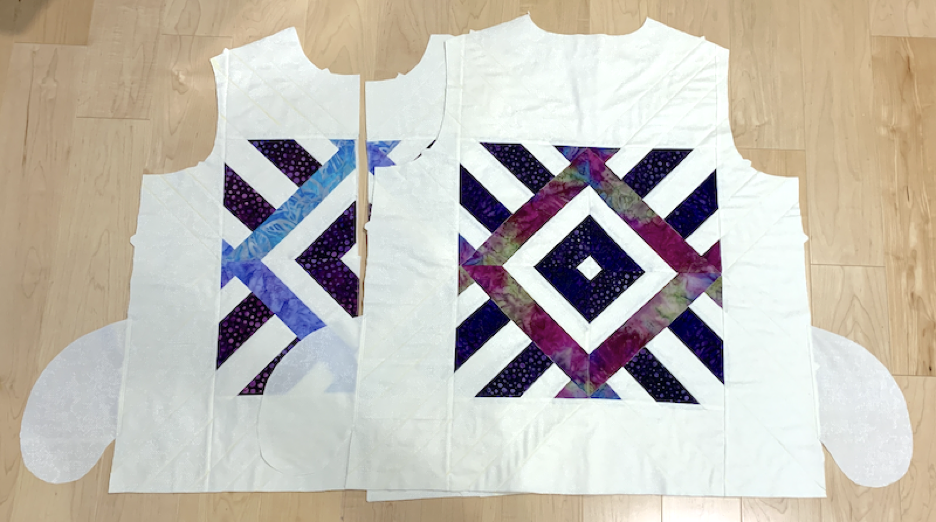
Then I tried to decide whether to quilt the pieces as rectangles or cut them out first and then quilt them. I decided it would probably be easier to quilt them as rectangles so I did that for each pattern piece, except for the pockets. I figured it would be cozy but too bulky to also quilt the pockets.
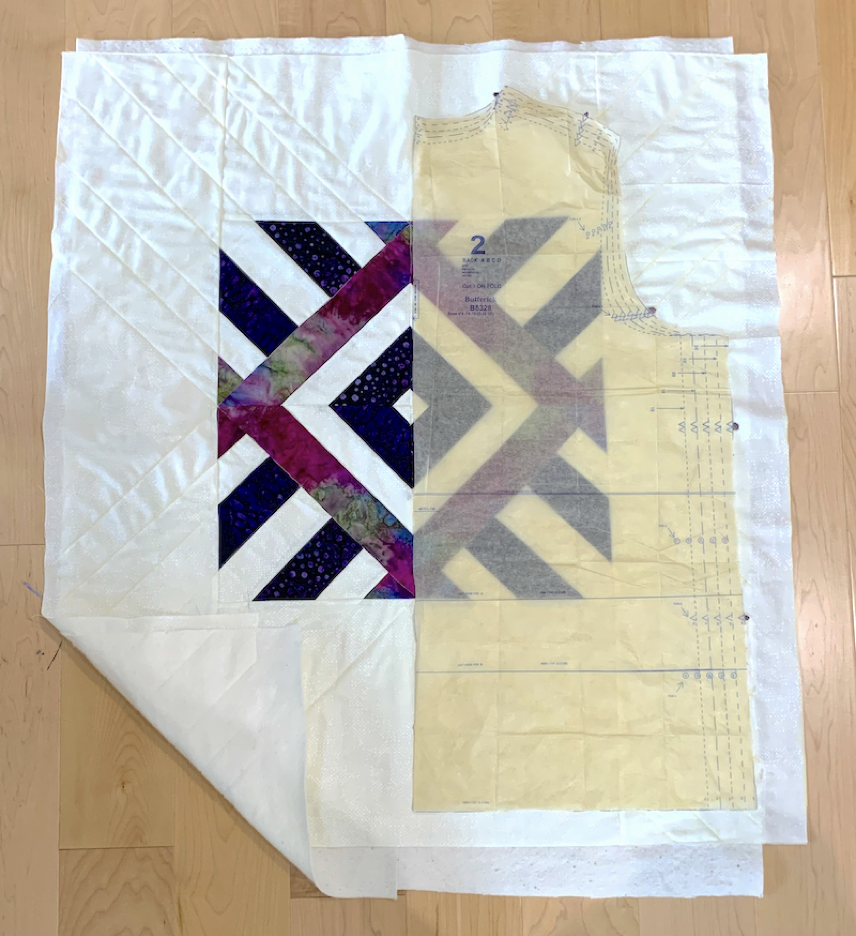
Here is how the back section looks after quilting with just batting. I included the pattern piece, which is meant to be on the fold, for comparison.
Cut Out the Pieces
Then I put the pattern pieces back on the quilted rectangles and cut out each piece.
Assemble the Shell and Lining
First I sewed the pockets onto the front and back side seams.
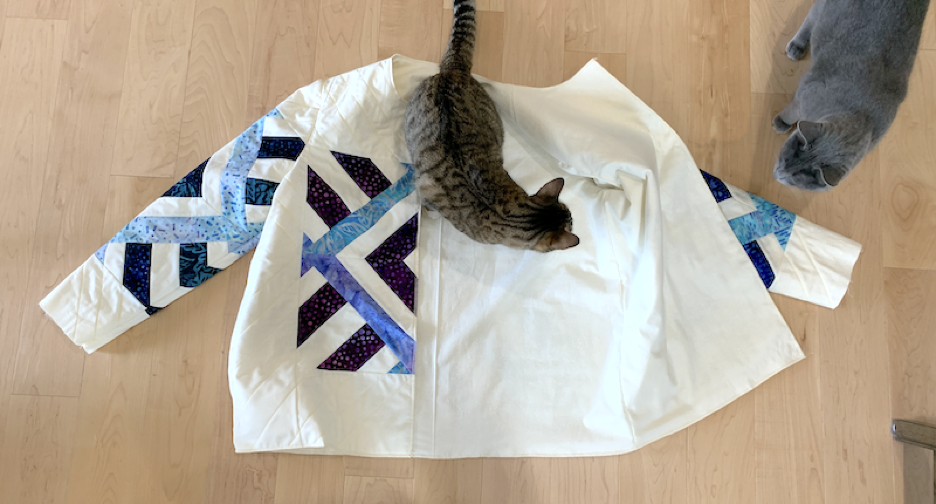
Next I sewed the shoulder seams, sleeves, and side seams (including the pockets) to create the outside shell.
Then I did the same for the lining except for the pockets, which I did not include inside the jacket as well.
Then I put on the lining, inside out, and put on the shell over it.
Then I took the shell/lining set off, pinned the exposed edges, and sewed them together.
I probably didn’t need to but I serged the edges after that, to make a nice clean edge for the binding. Of course my cats came to check it out as soon as I put in on the floor for a photo.
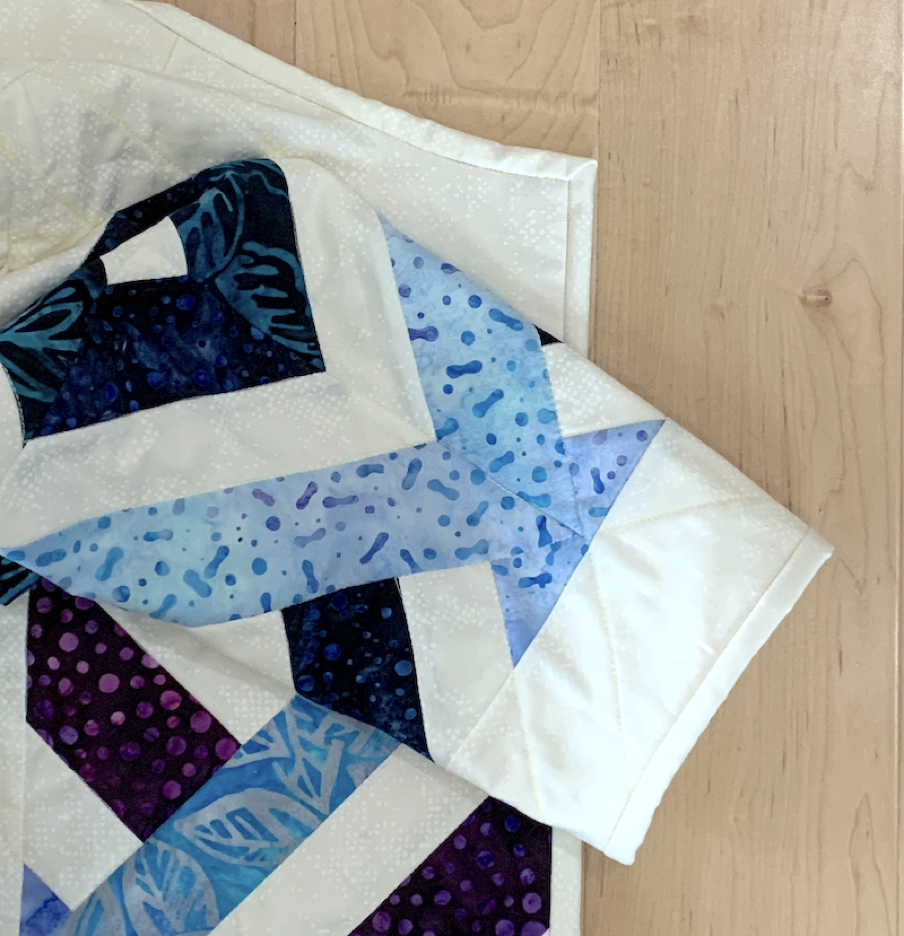
Bind Exposed Edges
Finally I bound the exposed edges, including the body and sleeve hems, the same way I bind a quilt with one exception. I found out last time that the binding needs to be a bit wider so I cut it 3 inches wide instead of the 2-1/2 inches wide I usually do for binding.
That’s it! It was a bit more work than the first quilted jacket I made but the results are totally worth it to me. I love the tidy look and feel of the inside without any exposed seams and I love having pockets.