layer cake quilt collage

Layer Cake Quilt

I have a few layer cake precut sets on hand and I’m always looking for a design to use with them. I really like this design from Sewing Studio. It looks good and it uses every bit of one standard layer cake precut set (no waste).

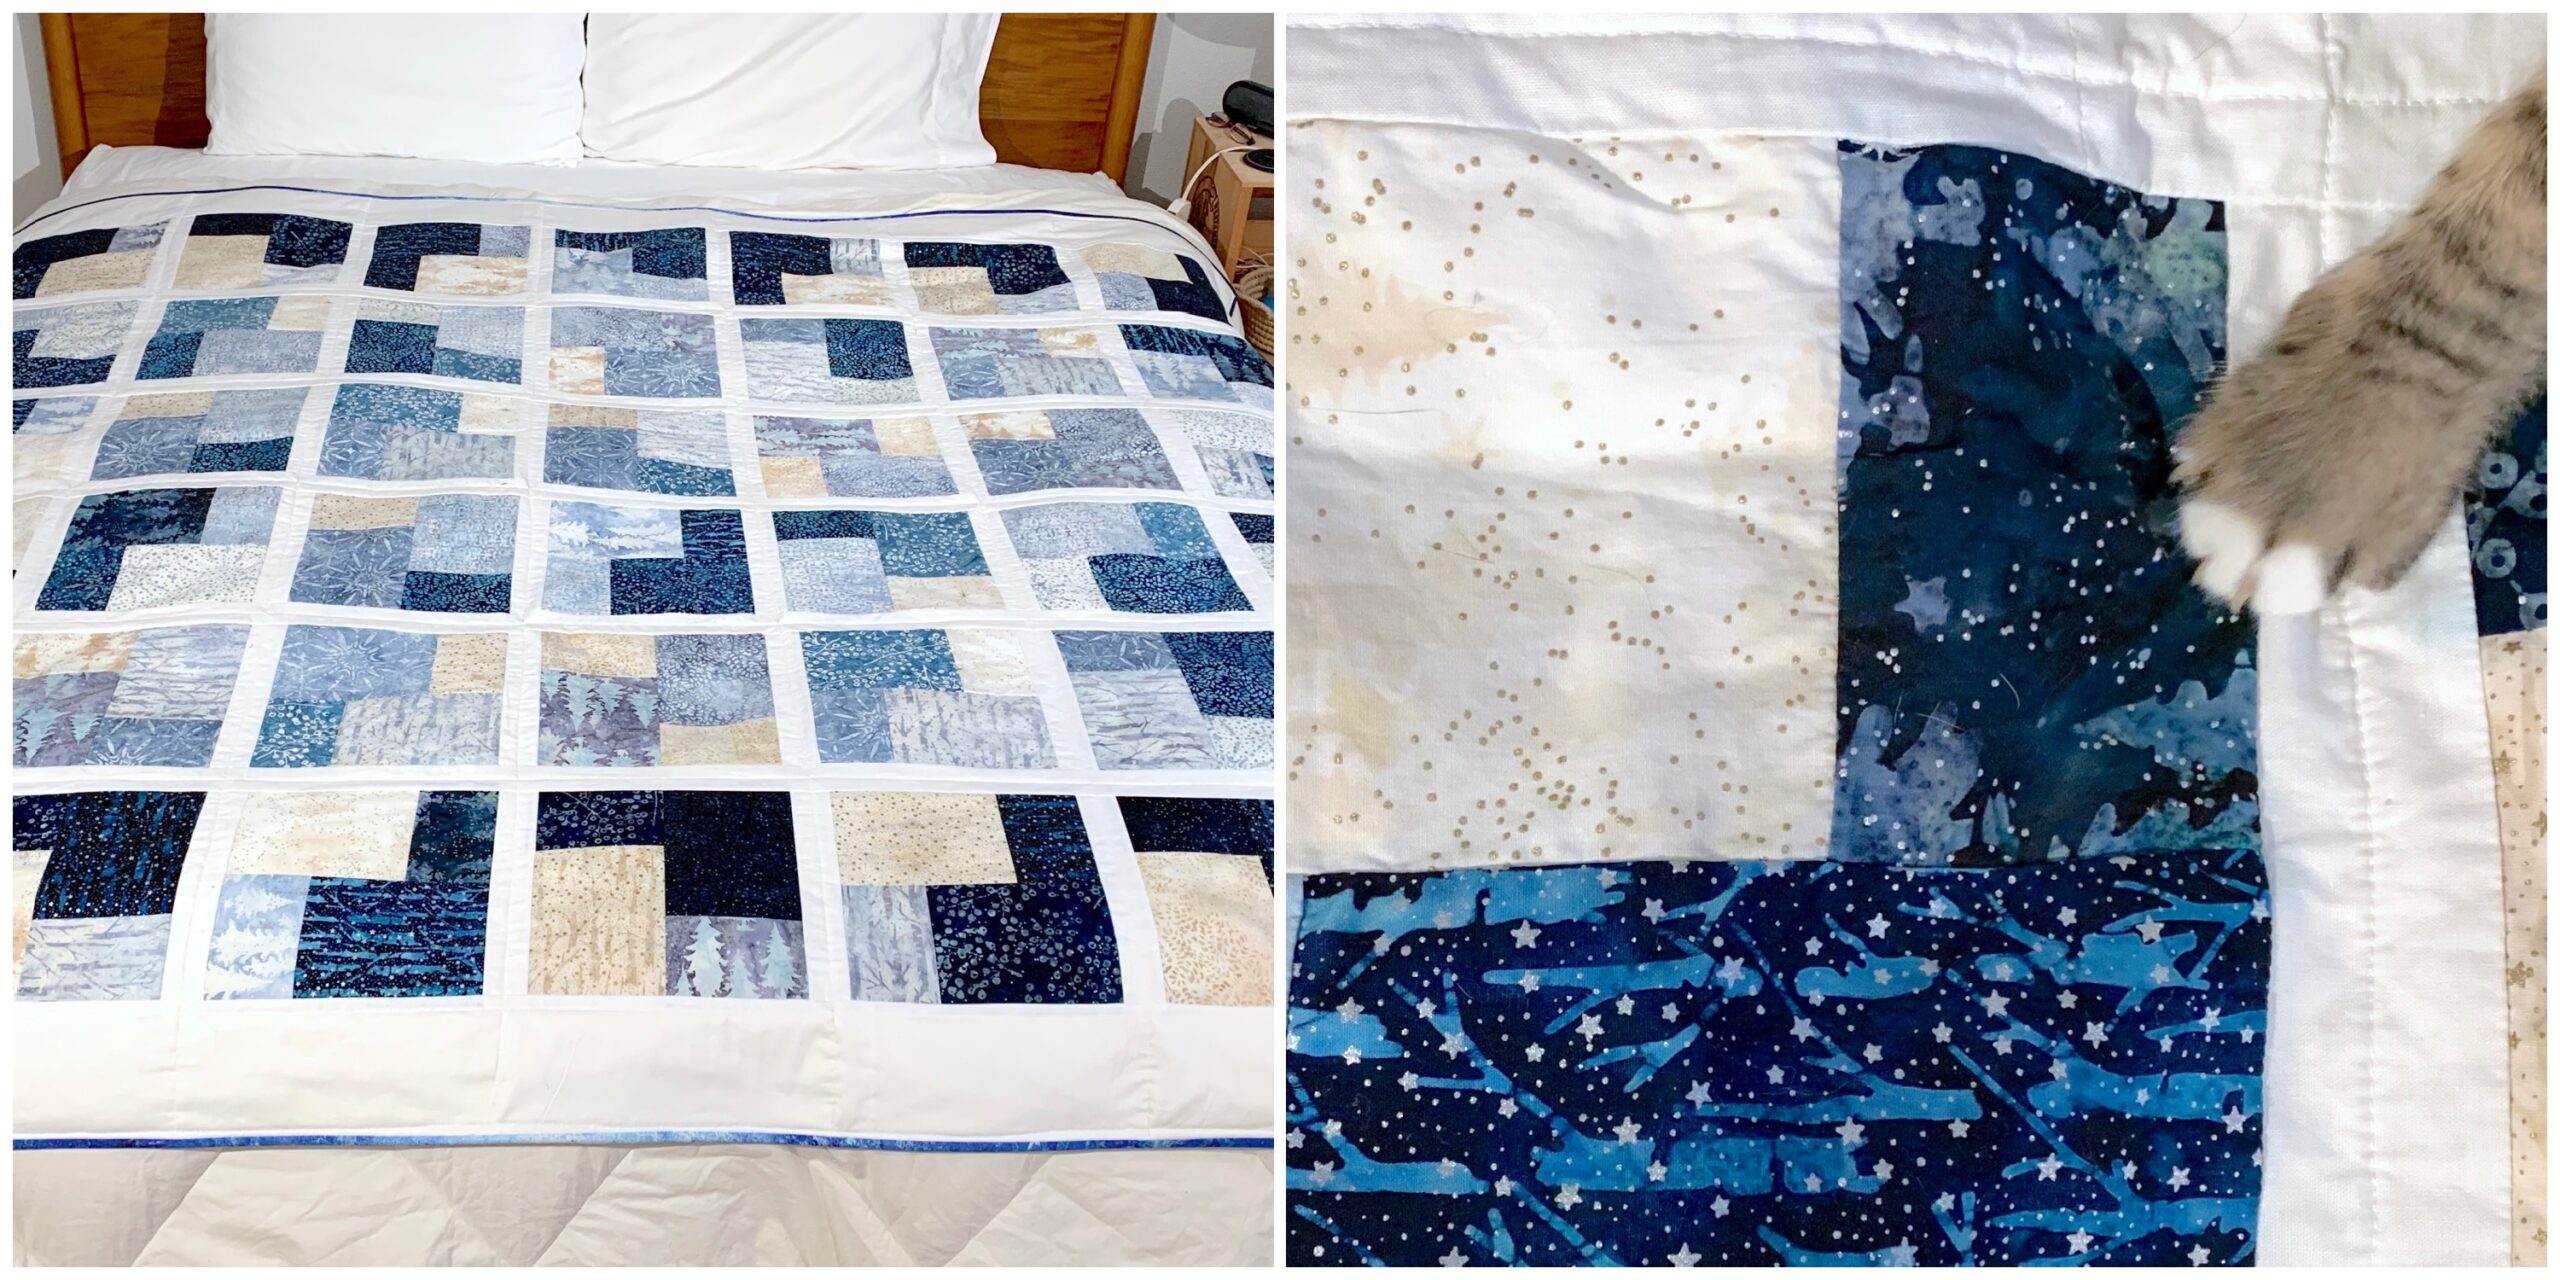
I used the “Magical Winter” layer cake set from Robert Kaufman, which I purchased from https://modernquiltco.com/  Each piece in the set has either gold or silver sparkles, which I really like.

Finished size of the quilt I made is 71-1/2 inches by 82-1/2 inches, and it’s 6 blocks by 7 blocks.

Here are the steps I did:

  1. Unwrap one layer cake precut set.
  2. Cut one 3-1/2 strip off each layer cake piece. Lay the pieces to the side in the order you cut them.
  3. Turn over one stack (doesn’t matter which one) to disorganize the colors.
  4. Sew one 3-1/2 strip to one 6-1/2 inch strip for each strip in the stacks.
  5. Press seams to either side.
  6. Cut each square in half across the seam. Each piece will be 5 inches wide.
  7. Once again, turn over one stack to disorganize the colors.
  8. Sew one from each stack to one from the other stack with the smaller blocks in opposite corners.
  9. Press seams to either side.
  10. Lay blocks out alternating between vertical and horizontal within each row and row by row.
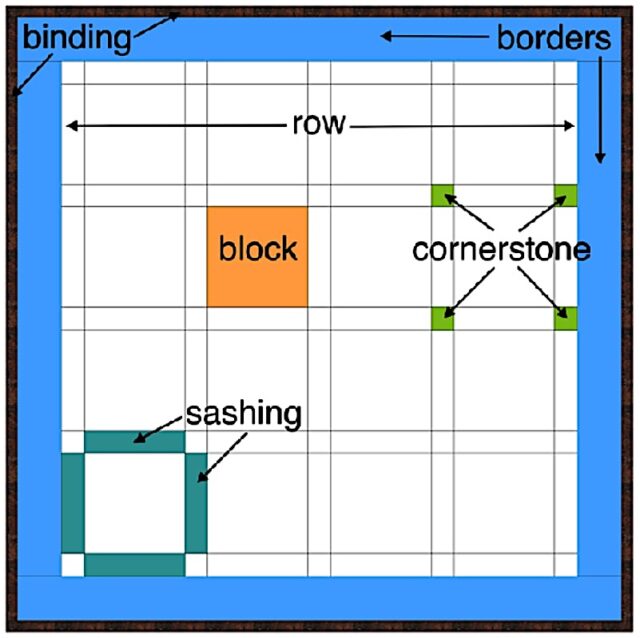
  11. Add 2 inch (cut width) vertical sashing between the blocks in each row.
  12. Stitch blocks of each row together.
  13. Add 2 inch (cut width) horizontal sashing to the bottom of each row except for the bottom row.
  14. Stitch the rows together.
    Finished size so far is 62-1/2 inches by 72-1/2 inches.
  15. Add a 5 inch (cut size) border to the sides and then to the top and bottom.
  16. Assemble and quilt sandwich (top, batting, and backing).
  17. Add binding. I used 8 2-1/2 inch strips for my binding.

Basic Quiltmaking Techniques

Here is the second in my series of lessons for absolute beginner quiltmakers. I wish I had this information in one place when I first started making quilts! There are a number of different choices for nearly every technique I describe. These are my favorite techniques, including:

  • Folding your yardage
  • Using a rotary cutter
  • Chain piecing
  • Sandwiching your layers
  • Quilting your sandwich
  • Binding your quilt
  • Washing your quilt
  • Reference, including quilt sizes and yardage measurements

There is a link to download the PDF below.

Introduction to Making Quilts

I have loved working with fabric since I took a sewing class in junior high school. At that time, I made everything from men’s shirts to ice skating dresses. Then I went off to college and didn’t have time to sew for a few years. I took a quilting class in 1982 but, for some reason, it didn’t stick. Then I took another quilting class in 2019 and this time it really stuck! I’ve been making quilts ever since, and loving it. I love the colors, the designs, and the satisfaction I get when I complete a new quilt.

People ask me what I do with all the quilts I make, which comes out to about one every two weeks. I keep my favorites, give many to family and friends, and donate the rest to people in need.

I started keeping a notebook in 2020. I wish I had started at the beginning of my quilting journey. In the notebook, I write the name of the pattern, if there is one, the name of the fabric, if known, and notes I take as I go. I also include a photo of the finished quilt. Since I give so many away, I like having a photo to remember quilts I have made but no longer have in our home. I also keep track of the number of the quilt, that is how many I’ve made up to that point. I have no idea why I do that but I do.

I notice that I like to write down everything I learn. I think that’s because I like organizing my thoughts into logical categories and also because I don’t want to have to remember everything. I especially like having project steps written down so I can go back to them later. I figured since I’m writing them down anyway, I might as well share them with others. Here is the Introduction I came up with for absolute beginners at making quilts.

Face Mask Experiments

I’m still wearing a face mask everywhere I go. It’s a sign of the strange times we live in. I haven’t made a new face mask in months but I wanted to make one I found easier to put on (elastic instead of cloth ties) and I wanted to make a few for holiday gifts to go with the small tote bags I’ve been making (see https://quiltingbydiana.com/small-tote-bag-experiments-and-tutorial/ for details).

When I first started making face masks I bought two Accuquilt dies to make the cutting easier. One was in three pieces so it didn’t seem likely to be the simple design I was looking for. I tried the other one, first the outer layer and then, when that was way too big, the inner layer. Didn’t like the fit of that either. So I tried the center piece of the three piece design and that was way too small.

Next I started searching online for free designs I could try out. I tried three different designs before I found one I liked and that I could make using a simple technique. Here are the results of the experiments.

I found the tutorial I liked at https://www.prettyhandygirl.com/best-fit-facemask/

I tried the technique she described and it seemed more complicated than I needed. So I wrote up the technique I used for this design and pattern. There is a download link in the document window and below it.