I’ve been wanting to make a quilted jacket for a while. I tried making my own pattern but found it difficult to draft the sleeve cap and I ended up buying this pattern.
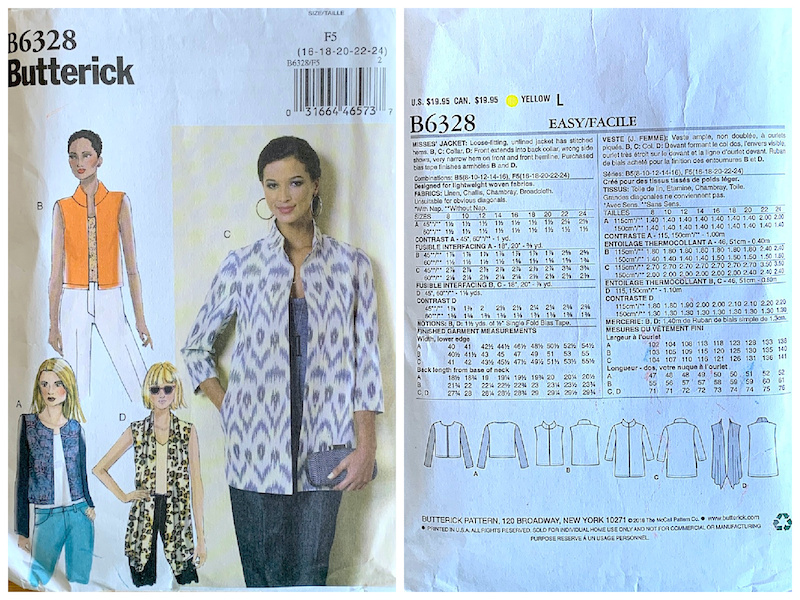
You can see that the pattern has different lengths and neck styles. I used the sleeve and neck style from A and the length from C.
Since this was to be my first try at a quilted jacket I figured I wouldn’t use my favorite fabric or make a special quilt for it. I had a quilt top around that I never sandwiched and finished as a quilt because I didn’t like it enough to put in the time and materials at the time I made the top.
Now I went ahead and sandwiched the top and quilted it but did not add binding.
I created a full-size back pattern so I could see how it would lay on the quilt for cutting. And I created a second front pattern piece from the original for the same reason.
I laid the pattern pieces out on the quilt and found that I didn’t have enough area to also cut out the sleeves. That’s okay, for this first try I figured I would make them out of a solid cream fabric I had around, which I did.
I have been watching videos on youtube of how other people made quilted coats and here are some that I especially liked:
Upcycled patchwork quilt coat diy
Making a Quilt Coat | Repurposing Damaged Quilts into Wearable Clothing
Quilting Window – Quilted Jacket
The first video in the above list was the push I finally needed to get a serger. I got the one she used in the video after reading reviews about it online and hearing that it is not terribly expensive, generally reliable, and has an easier to thread system than many other sergers. It arrived and I was afraid to set it up 🙂 I finally set it up the next day and did some practicing.
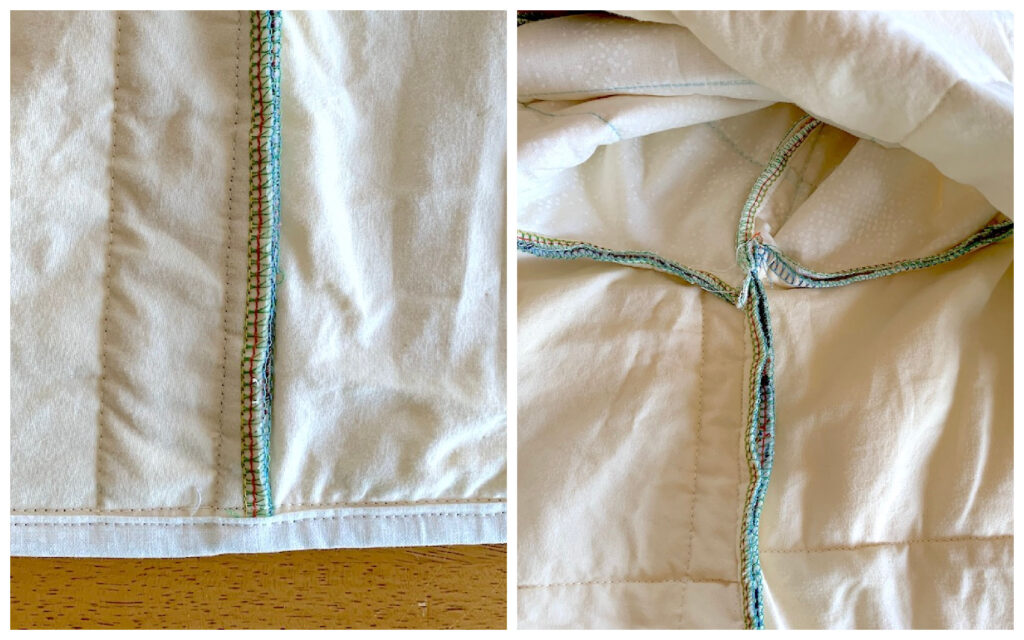
Then I serged around all the jacket pieces I had cut out: back, two front pieces, and two sleeve pieces. It’s kind of fun once you get the hang of it!
I sewed the shoulder seams on the front and back pieces, right sides together. Then I decided to topstitch the serged seam layers to make them lay flat. It was easy on the shoulder seams because they are straight and short.
I often like to sew the sleeve in before sewing the side seams on my garment body and on the sleeves. I find it’s much easier for me to navigate the complex curves that way. I sewed the first sleeve on and tried to topstitch the serged seam layers but it was much harder because of the curves. Hmmm. I decided to not do that on the second sleeve and see how it feels to wear and how it looks.
Then I sewed the sleeve and side seam next to the attached sleeve. Easy peasy. Topstitching the serged seam layers not so easy. Perhaps this wasn’t such a great idea after all.
I tried on the jacket and, other than the sleeves being too long, I really liked how the result looked and felt.
So I attached the second sleeve and sewed the long seam along the sleeve and side it was attached to. I did not topstitch the serger layers.
I tried the garment on again and I like it better without the topstitching. Well that simplifies things.
Next I marked the sleeve length I wanted and trimmed off the extra. Then I cut a 2-1/2 wide inch strip to bind the sleeve bottoms, the same way I do for a quilt.
I tried the jacket on again to see whether I wanted to make any adjustments on the front edges. I think it’s fine the way it is. It’s comfortable to sit down in and I could add buttons later if I wanted to.
I learned another lesson on the next step. I cut 2-1/2 wide inch strips for binding for the neck, front, and bottom edges but I should have cut 3 wide inch strips. I sewed about a 3/8 inch seam instead of a 1/4 inch seam to make sure none of the serging would show but then I didn’t have enough on the other side to sew the binding down without catching it on the front. Oh well. Lesson learned and it doesn’t look bad, just not my favorite look for binding.
I can imagine so many wonderful quilt designs to use for future jackets! I do want to try one with a floating lining because I think that might feel better for wearing but that’s a project for later.
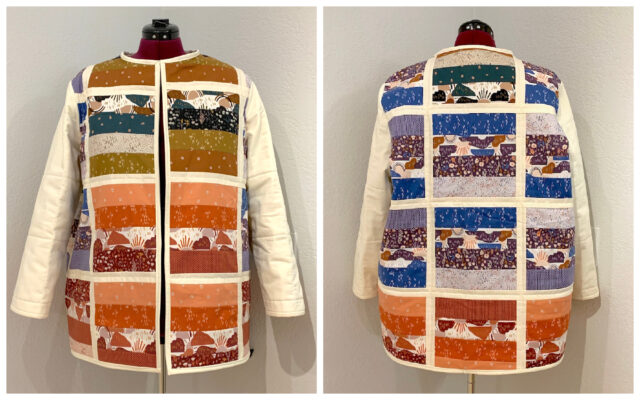
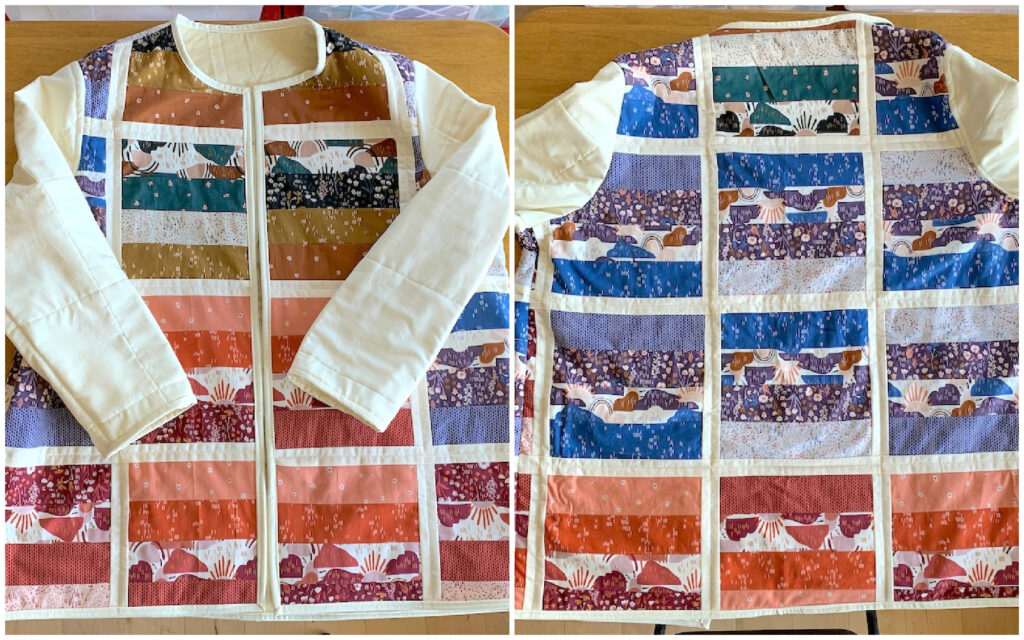
Here are some views of the outside and inside of the finished jacket.
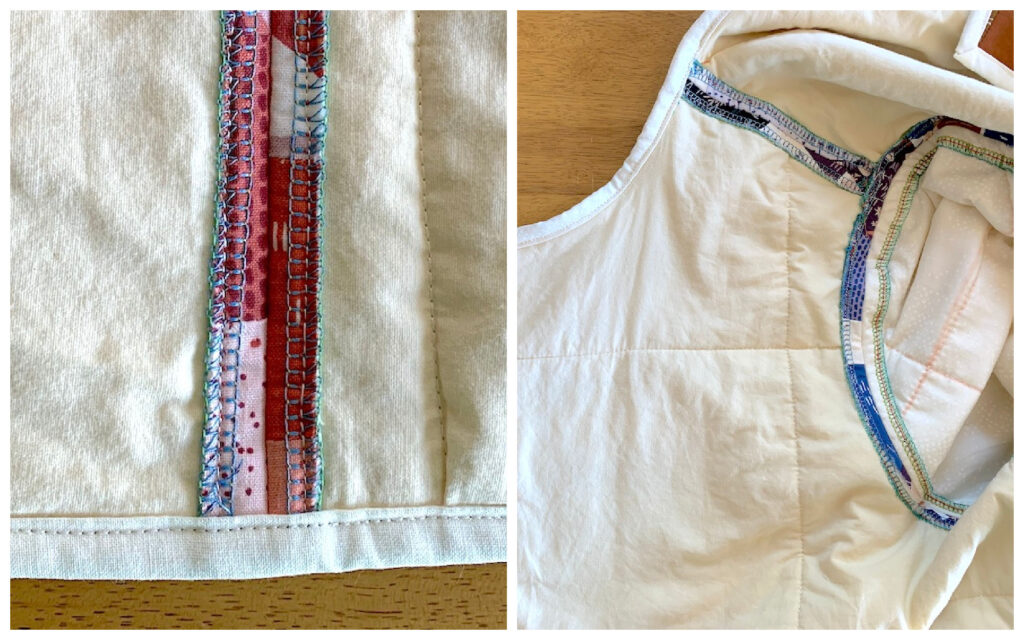
tight around the armhole for wearing.