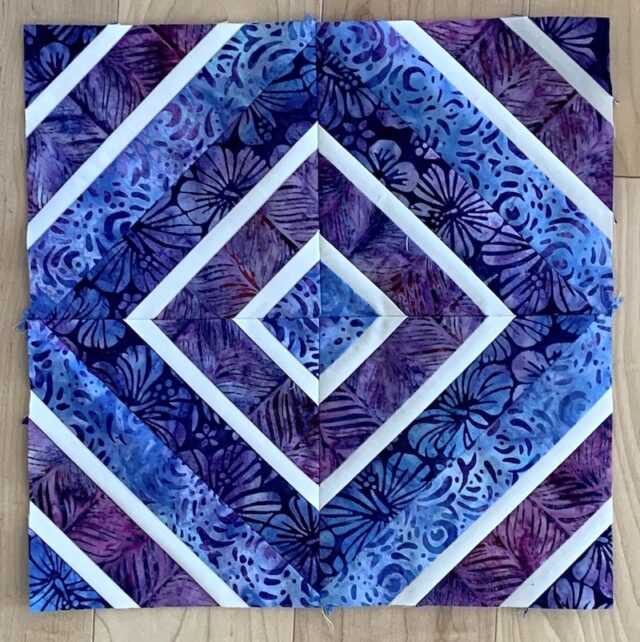
Tube Method for Half Square Triangle Blocks— Experiments
When I started making quilted tote bags, it occurred to me that the front and back can easily be blocks of any type as long as they ended up about 16 by 16 inches. So I started thinking, what’s fun? I’ve always liked the look of striped half square triangles made into squares, and then assembled in interesting ways.
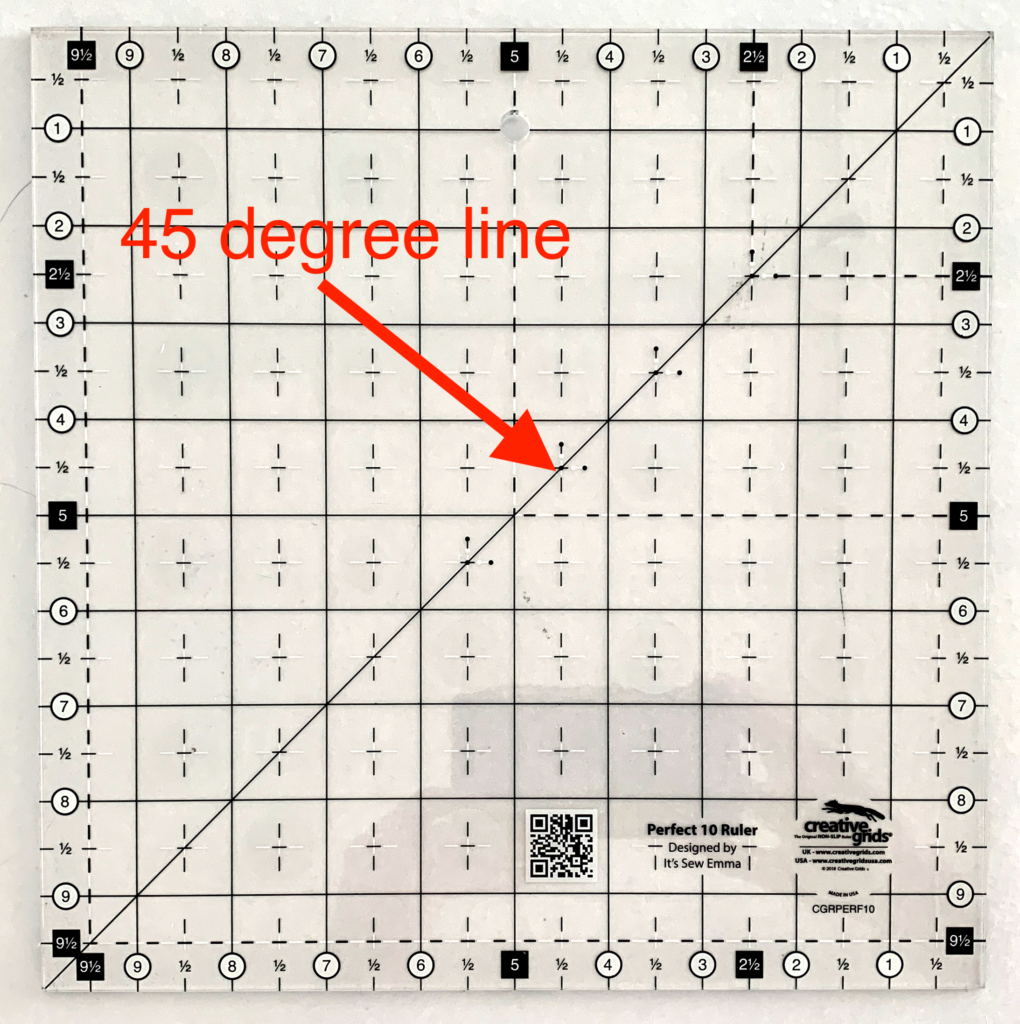
Many, but not all, quilting rulers have a 45 degree angle line on them. One of my favorite rulers is the Creative Grids Perfect 10 Ruler. If you draw a line from corner to corner on a square, this marks the 45 degree angle.
The following instructions assume you are making two 16 by 16 inch blocks. You can, of course, make just one.
1. Assemble or cut 2-1/2 inch strips, 4 of each of 3 colors. Dark, medium, and light work well but you can use whatever you want. In my case, the front and back of my tote bag will be different so I have 2 sets of 2-1/2 inch strips of each color combination.

2. Sew strips together in sets of 3, from dark to medium to light or whatever order pleases you. Press open the seams.

3. Pin two strips sets, right sides together, with the dark color of one set matched to the light color of the other set.
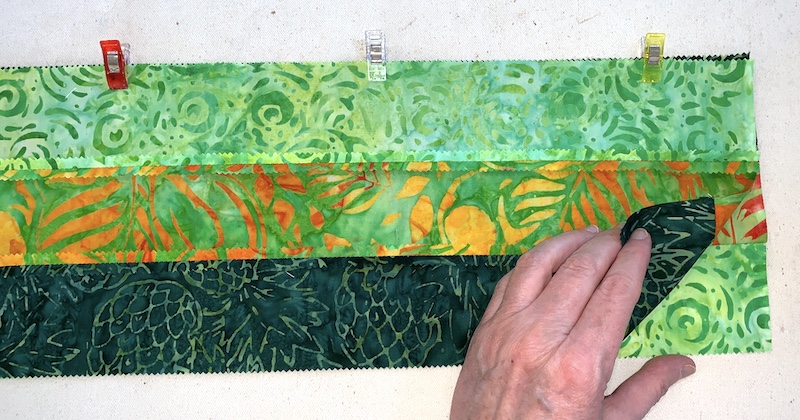
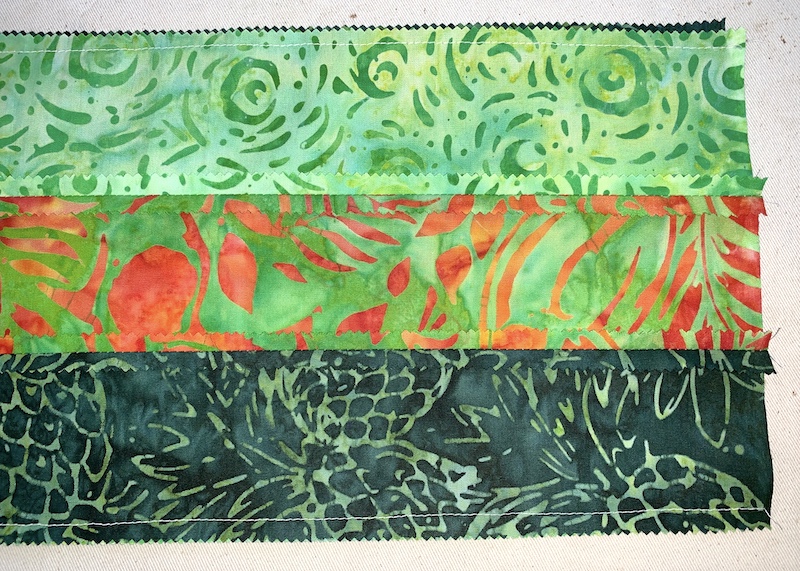
4. Sew a 1/4 inch seam along each long edge. This creates the tube that gives this method its name.
5. Using a ruler that has a 45 degree angle, lay the 45 degree line along the bottom seam. The red arrows point to the bottom seam and the 45 degree line.
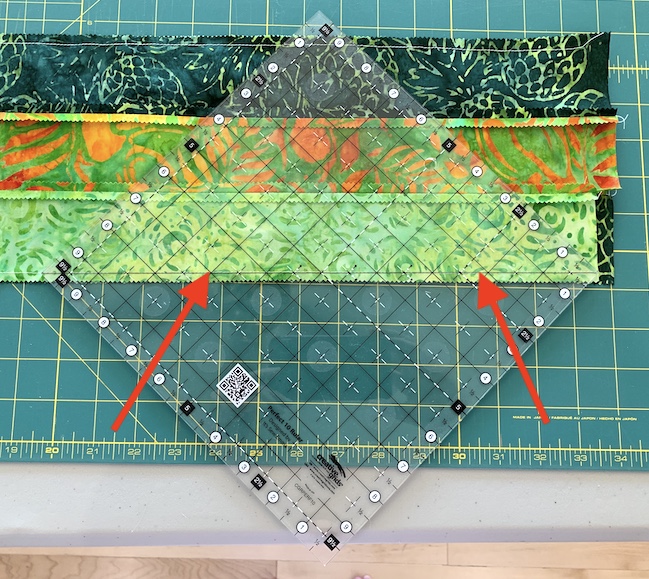
6. Cut along the right edge of your ruler.
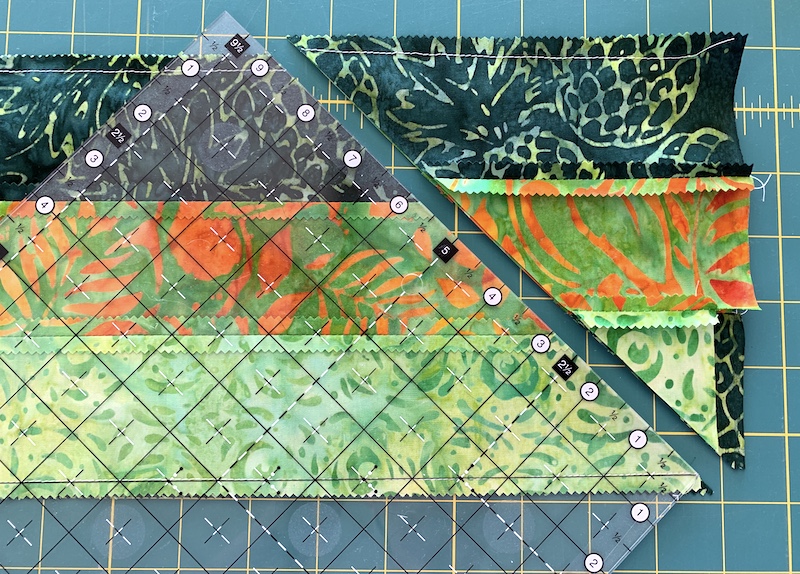
7. Move the ruler to the left and up. Lay the 45 degree line along the top seam and cut as shown.
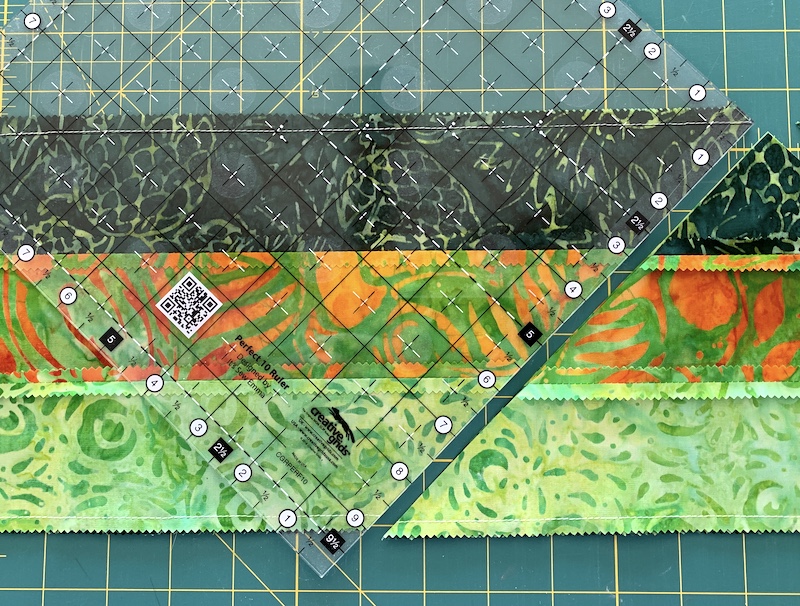
8. Repeat steps 5 through 7 to cut 3 more triangle sets.

9. Repeat steps 3 through 8 for the other two strip sets.
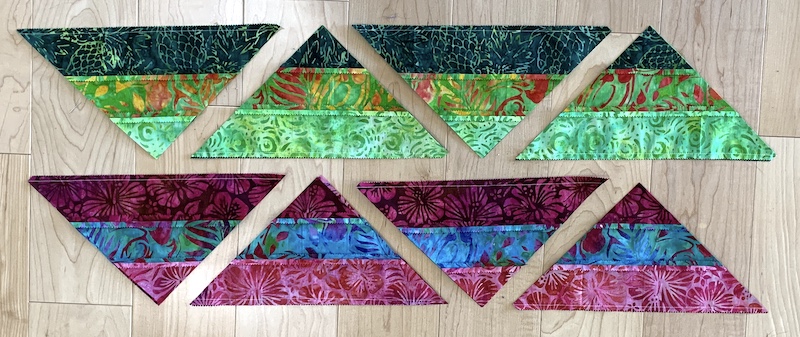
10. Press the seams open on all the triangle sets.
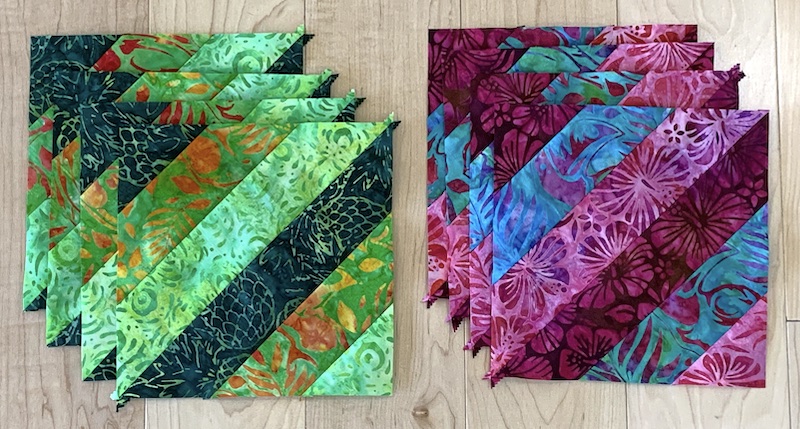
11. Lay the blocks out, 4 at a time, to make a design that pleases you. I prefer the light color in the center but you may prefer the dark color in the center.
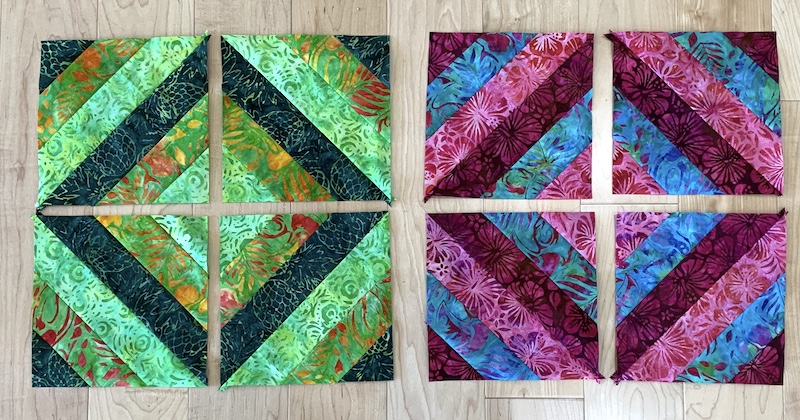
12. Sew the blocks together, 2 at a time, matching seams along the edges. Press the seams open.
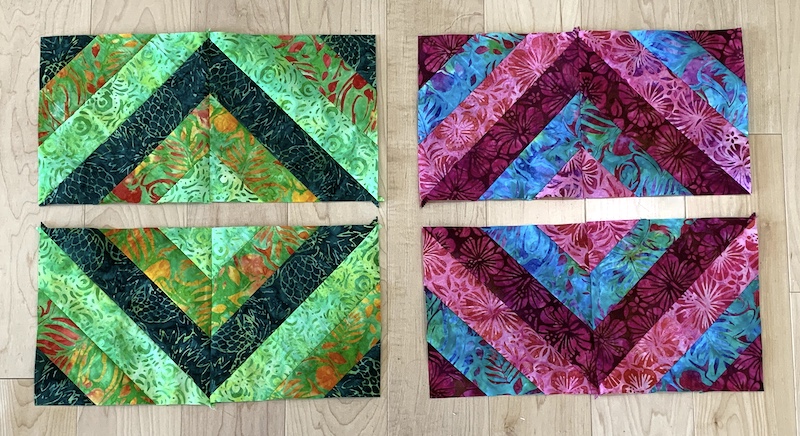
13. Sew the 2 block sets together to create two 4 block sets. Again, match the seams along the edges. Press the seams open.
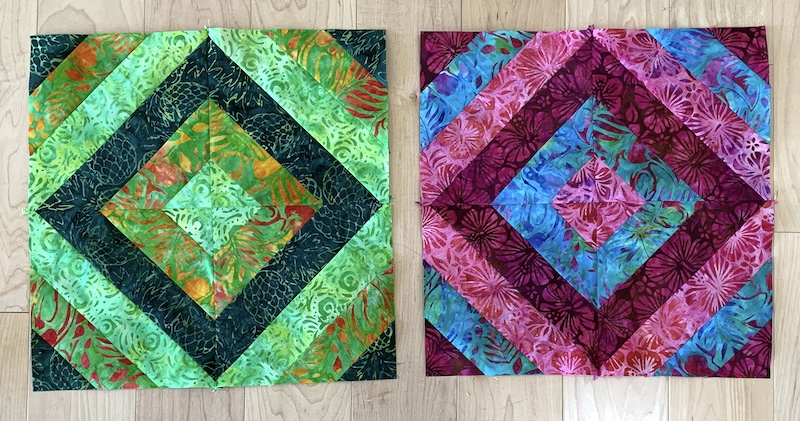
I decided to try some variations to see what other block looks I could come up with.
Variation 1 — Narrow Separator Strips, Oops
For my first variation, I thought it would be cool to have narrow separator strips between the wider strips. I tried making the two strip sets as follows:

Then I sewed the edges closed, cut the triangles, pressed them open to make squares, and sewed the squares together. This is how it came out. The oops part is that there isn’t a separator strip between two of the wider strips. I like how it looks; it just isn’t what I was expecting. Also, it ended up 14-1/2 by 14-1/2 inches instead of 16 by 16 inches.

Variation 2 — Narrow Separator Strips, Success! Sort of.
For my second variation, I thought out what would fix the missing narrow strip problem. I tried making the two strip sets as follows:

Then I sewed the edges closed, cut the triangles, pressed them open to make squares, and sewed the squares together. This is how it came out. The success part is that there is now a separator strip between all of the wider strips. However, I don’t like the look as much as the previous variation. It did end up making a 16 by 16 inch block.

Variation 3 —One Layer Solid and One Layer Print Strips
For my third variation, I wondered what the result would be if I made one of the two layers of the tube a solid fabric. I made the striped set as in the instructions above, with the strip fabric batik prints. Then I cut a solid fabric strip 6-1/2 inches by width of fabric.
Then I sewed the edges closed, cut the triangles, pressed them open to make squares, and sewed the squares together. This is how it came out. It’s not bad but I’m not that fond of it.

Variation 4 —One Layer Print and One Layer Solid Strips
For my fourth variation, I wondered what the result would be if I made one of the two layers of the tube a print fabric. I made the striped set as in the instructions above, with the strip fabric solid color. Then I cut a print fabric strip 6-1/2 inches by width of fabric.
Then I sewed the edges closed, cut the triangles, pressed them open to make squares, and sewed the squares together. This is how it came out. I like this variation quite a bit!

I may come up with more variations later. If I do, I’ll share them too. I hope you enjoyed this blog post and that you will comment with ideas you have and let me know if you try any of these out.
My instructions for making the complete tote bag are available at https://www.etsy.com/listing/1061546252/quilted-tote-bag-tutorial-pdf .
