I have avoided making quilts with diamonds in them because they look hard to do! I can’t imagine how I will line up all those seams and points. I have seen three different techniques for creating diamond quilts.
- The first technique involves cutting out each diamond and sewing them together one by one. Obviously this works but I was looking for a less labor-intensive and error-prone technique.
- I saw the second technique in the “Make a Simple Diamond Quilt with Jenny Doan of Missouri Star” youtube video (https://youtu.be/ncBPCHzliRI). In this, Jenny creates the diamonds using two triangles, sewn along the shortest edge.
- The third technique involves sewing strips together and then cutting sets of diamonds, which are then sewn together. This is the technique I’m going to try out.
I’m sure there are other techniques and, if you know of them, I hope you’ll put information about them in the comments for this post.
For my experiment, I am going for the traditional harlequin design, which has horizontal rows that are the same color.
- Cut nine 2-1/2 inch strips by width of fabric of two or more different colors. Lay out the strips in whatever order you want the colors to be across the panel.
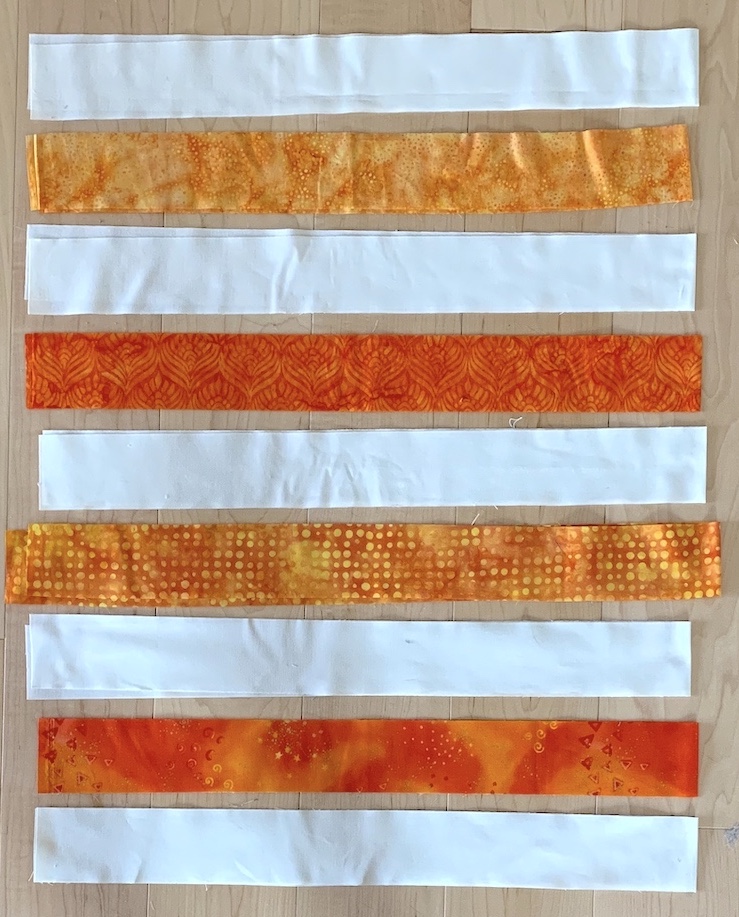
2. Sew the strips together, along the long edges, in that same order. Press the seams open, either as you go or all at once.

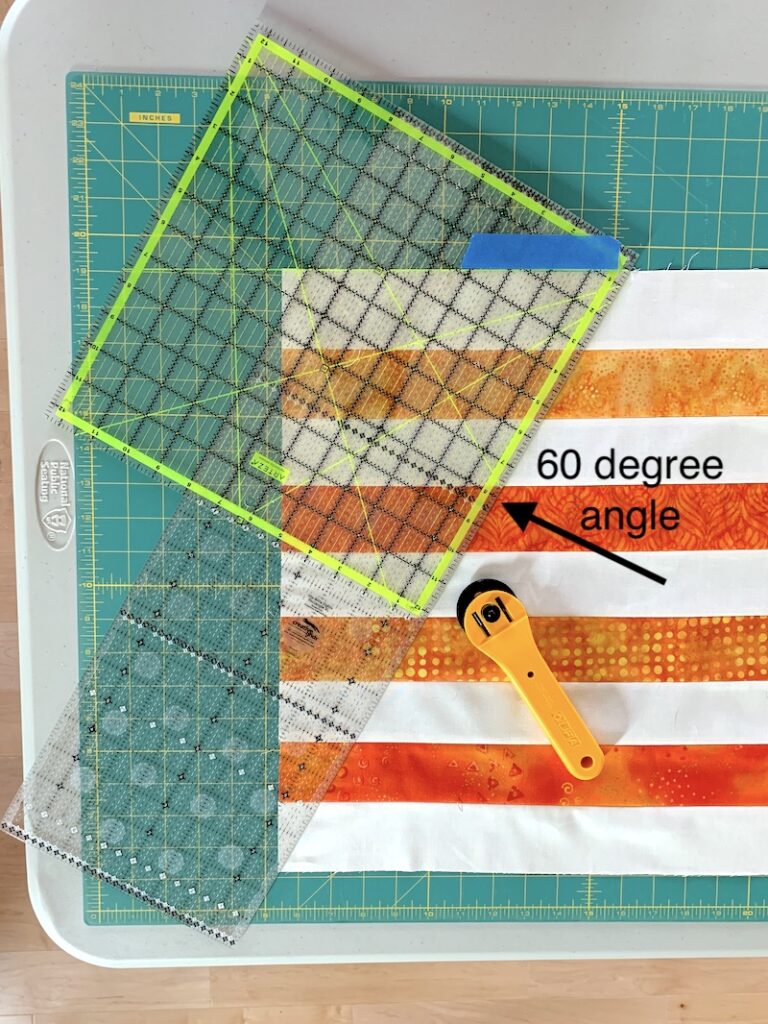
3. Line up and make a cut along a 60 degree angle, ending at the lower left corner of the strip set. I don’t have a ruler that has a 60 degree line and is long enough so I put a longer ruler underneath it and lined up the edges. You only need to do this once for the panel. (The blue tape is to remind me where the 60 degree line is.)
4. Since the strips are 2-1/2 inches wide, make your next cut 2-1/2 inches wide, parallel to the 60 degree cut you already made.
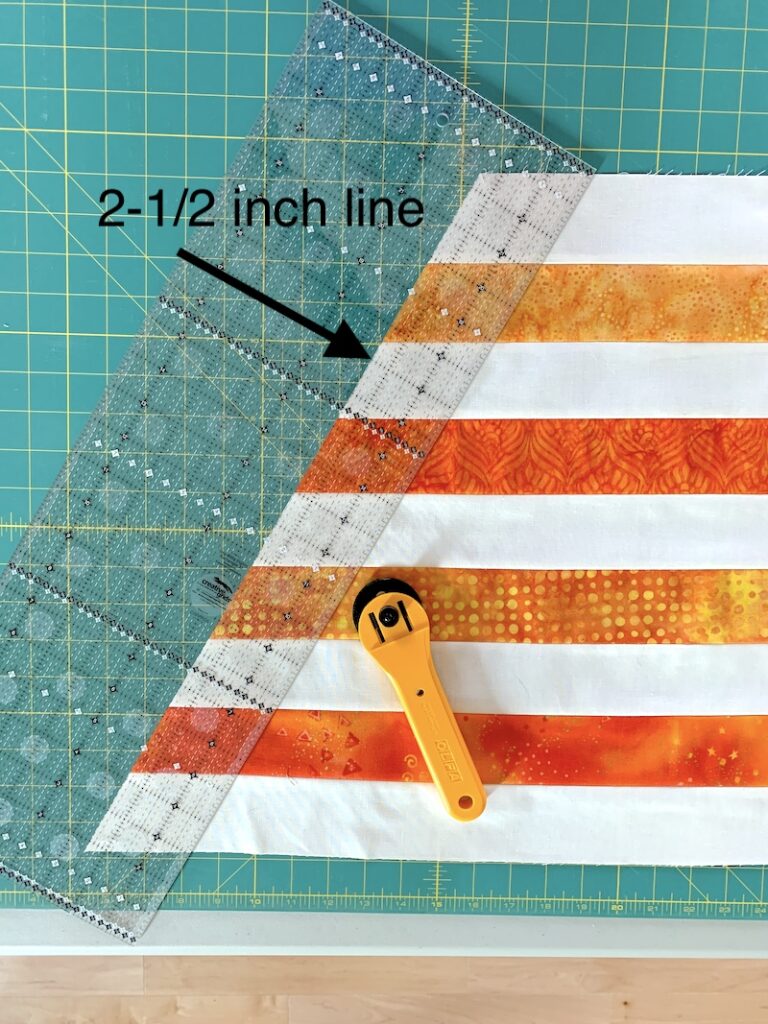
5. Repeat to cut 10 strip sets total.

6. Stitch the first two cut strip sets as follows, making sure you line up the edges as shown in the diagram.
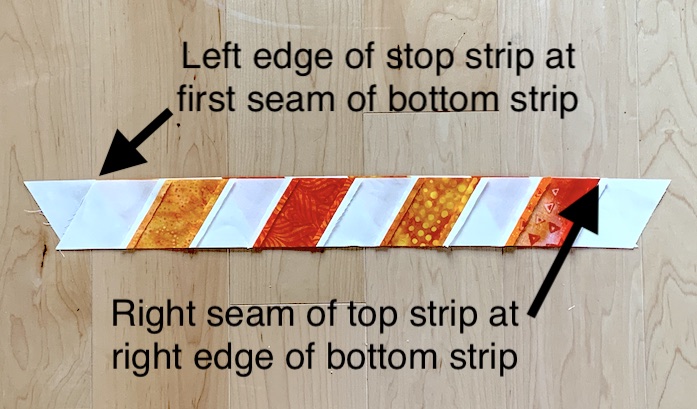
Here is a closer view.
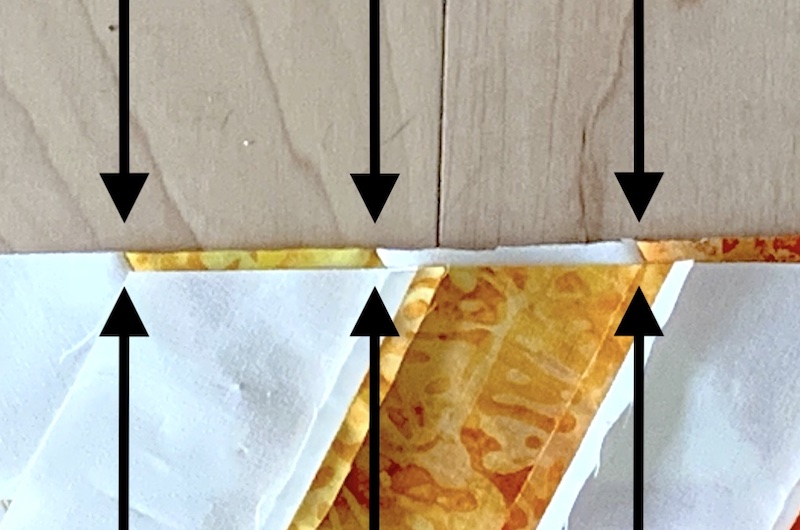
7. Press seam towards the strip you just added.

8. Repeat steps 6 and 7 until you have sewn together all 10 strips sets.
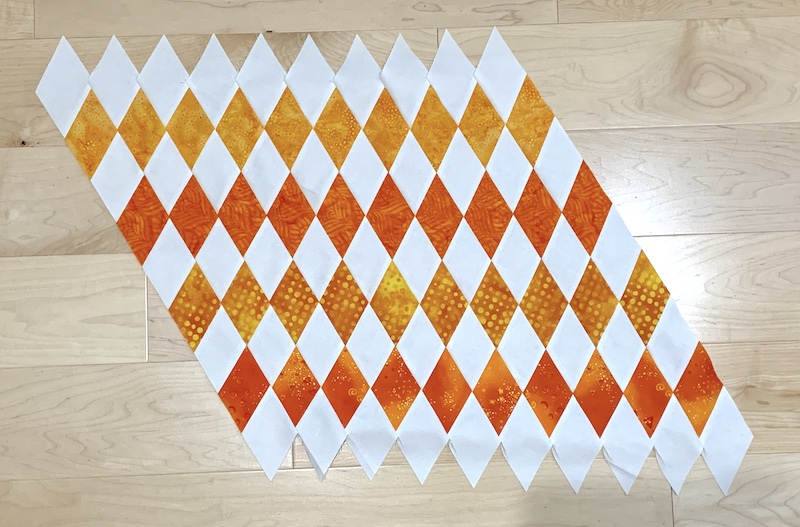
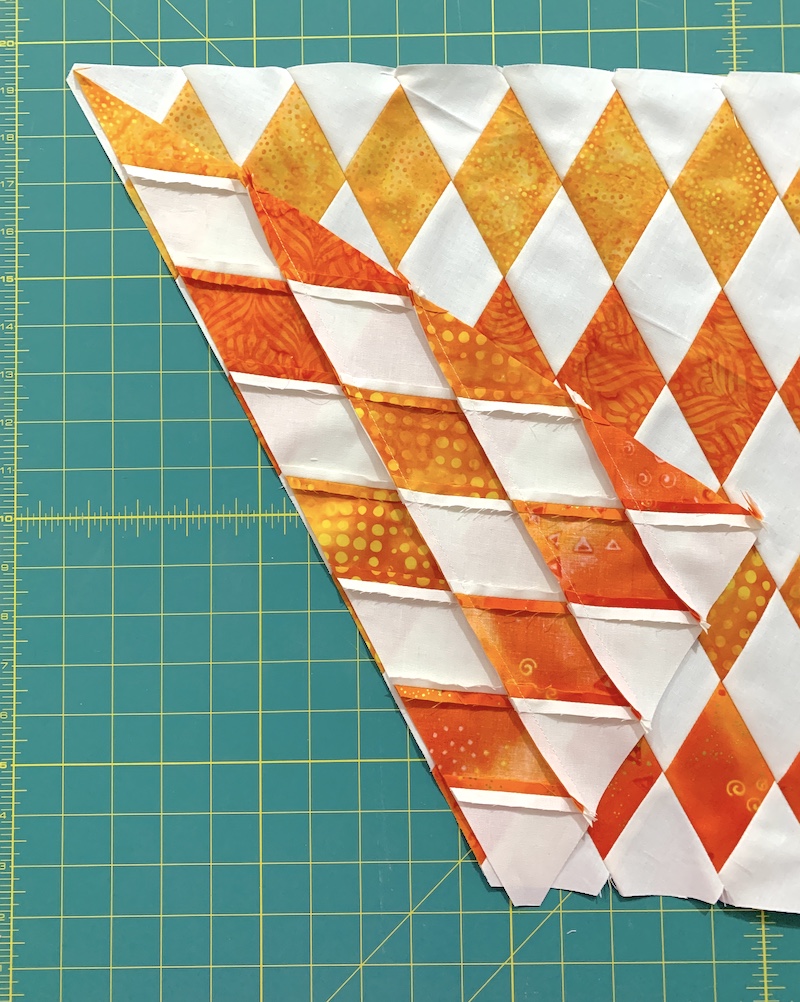
9. Trim the overhanging points on both sides, leaving 1/4 inch from the point of the next row of diamonds.
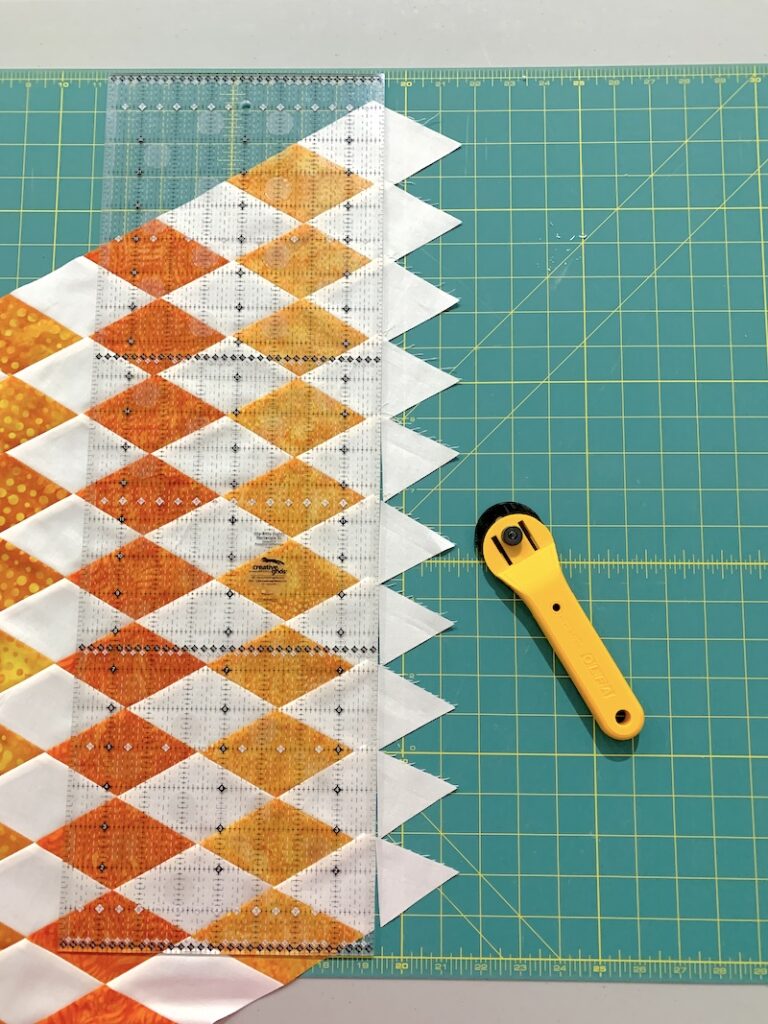
10. Trim the the side on the right, lining up 1/4 inch to the right of the last point on the upper edge and the corresponding point on the bottom edge. Keep the part you cut off!
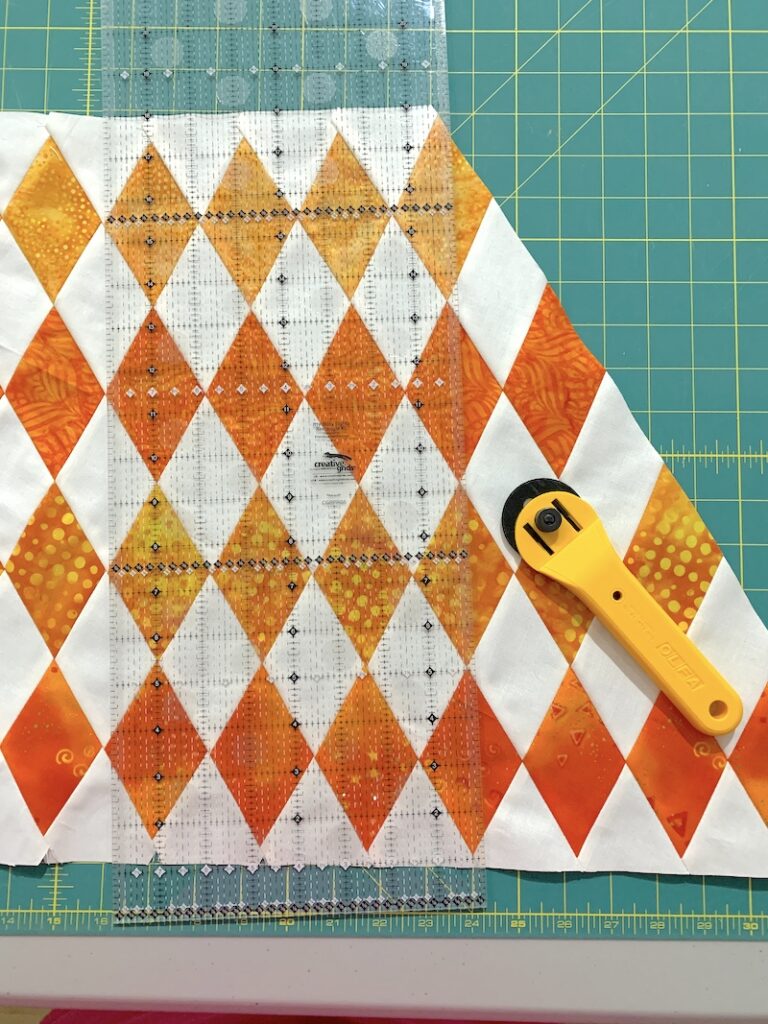
11. Flip around the piece you cut off and line up the color rows on the other end of your panel.

12. Flip the extra piece over to be right sides together with your panel. Stitch a 1/4 inch seam along the edge. Press towards the piece you just added.
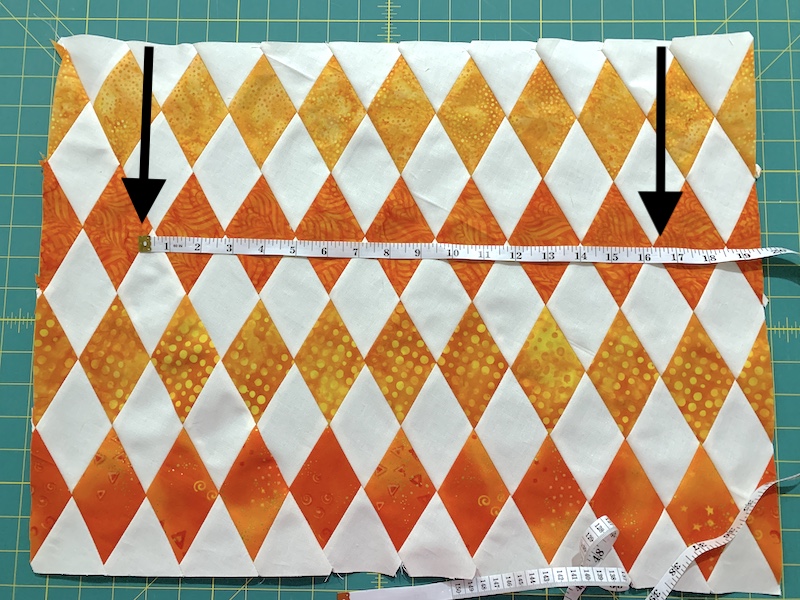
13. You now have a panel that is about 16-1/2 by 22-1/2 inches in size.
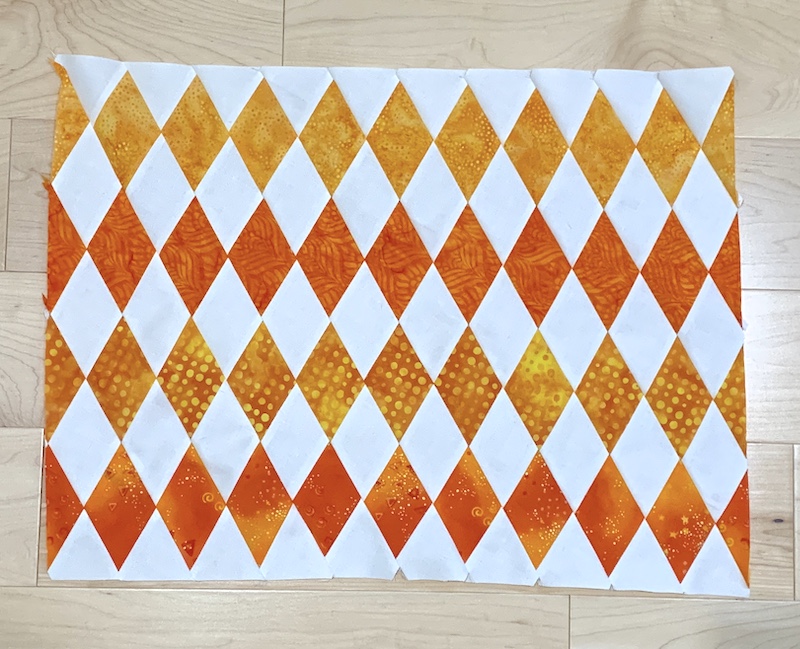
14. For my tote bag, I want my panel to be 16-1/2 by 16-1/2 so I will trim this panel to that size, paying attention to the edges of the diamonds I am cutting through.

I created a second panel, the same design as the first with different orange fabric selections, and used the two panels to create a tote bag.
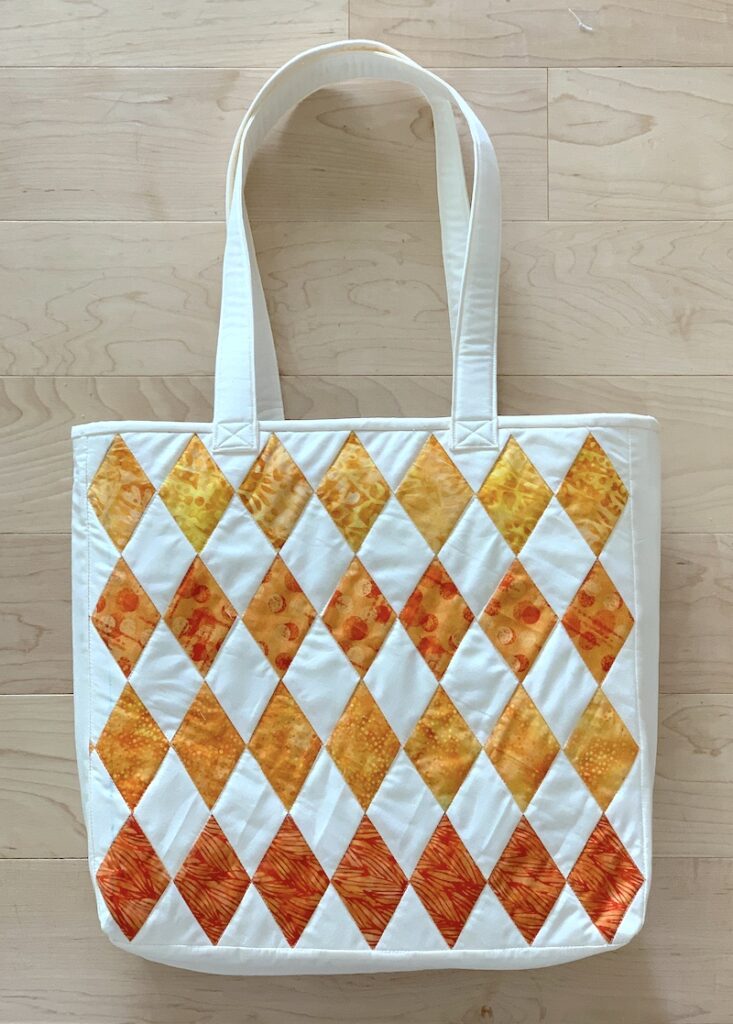
If you, like me, have been afraid of working with diamonds in quilting, fear no more! Give this technique a try. I think you’ll like it. I hope so!
My instructions for making the complete tote bag are available at https://www.etsy.com/listing/1061546252/quilted-tote-bag-tutorial-pdf .

Fantastic!
Thank you Karyn!